Braising Meat 101: How To Braise Meat Like a Pro
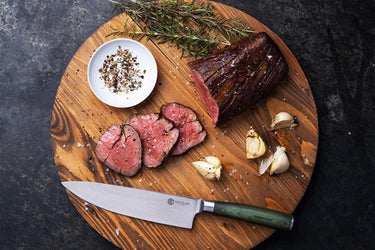
Is there anything better than eating a home-cooked meal after a long day? What about an easy-to-make comfort meal that fills your home with cozy aromas all afternoon?
If this sounds like a dream come true, then braising is the cooking technique for you. If you’re wondering what braising is and how to become a pro, we’ve got you covered.
What Does It Mean To Braise Meat?
Braising is a hands-off cooking technique that involves slow cooking pieces of meat until they are fall-off-the-bone tender.
Essentially, the meat sits in a bit of liquid over a low flame on a stovetop or in the oven. This process allows the connective tissue and collagen to break down into gelatin, turning even the toughest cuts of meat into melt-in-your-mouth bites.
During the braising process, ingredients release their fats and flavors into the braising liquid. This slow merge creates rich flavors in every bite.
Unlike stewing, you don’t fully submerge your meat in the liquid when braising. You also don’t need to cut your meat into pieces.
What Are the Benefits of Braising Meat?
For those days when you’re running on fumes, you can’t go wrong with braising meat. This low-effort method crafts delicious dishes without any hassle.
Once your ingredients are simmering, just let them be! While the cook time for braising meats is typically between one and a half to three hours, the majority of this prep time is hands-off. You can use this time to knock out other tasks, read a book, take a nap, watch TV, take a bath — whatever you need.
As you do you, the braising process will tenderize your meat, filling your home with mouth-watering scents that will brighten your mood. With just a single pan or dutch oven needed for braising, you’ll make less of a mess and save time on cleaning, too.
Braising is also extremely cost-effective. You don’t need a fancy cut of meat to make a tasty braised dish. Because your meat becomes tender through the braising process, a less expensive, tougher piece of meat is actually ideal.
With the right pan, braising meat can also yield large portions. Braising is an economic (and delicious) way to feed a crowd when hosting guests or celebrating special occasions.
Of course, the main benefit of braising meats is the taste. Braising brings out unreal flavors to create a truly spectacular dish.
What Are the Best Types of Meat for Braising?
Braising is a versatile cooking technique that can work with all sorts of ingredients. If you can dream it, you can braise it.
Tougher cuts of meat such as chuck roast, pork shoulder, and lamb shanks are ideal candidates. You also can’t go wrong with braised pork chops, beef short ribs, and beef brisket.
You can even braise lighter meats such as chicken. A beautifully braised chicken thigh is *chef’s kiss* tasty.
Bone-in meat is great for braising, too, as the bone marrow adds rich flavor to your dish.
While we typically associate braising with meat, you don’t need to be a meat-eater to enjoy these deep flavors and hands-off cook times. Braising vegetables creates wonderful vegetarian dishes any day of the week.
Our Step-By-Step Guide To Braising Meat
Once you’ve chosen your meat and veggies, all you’ll need is cooking oil, a braising liquid, and a deep pot or pan with a lid, such as the HexClad Deep Saute Pan or 8 Quart Pot. Red wine, beer, or stock are all solid braising liquid options, but you can even use water in a pinch.
Now, it’s time to get braising.
Brown the Meat
Before you start the braising process, you’ll want to take a few minutes to sear your meat.
Season your meat, and trim the excess fat if desired. Then, heat oil over medium-high heat. When the oil is hot, add your meat.
Once one side of the meat is golden-brown, turn to sear the other side. Keep on the heat until browned on all sides, then transfer the meat out of the pan and set it aside.
Sauté Your Veggies and Aromatics
Next, add your veggies and aromatics to the pan. These are your onions, shallots, garlic, and leeks. Carrots, celery, fennel, or mushrooms can be wonderful additions to the mix, as can herbs such as thyme or sage.
Pour In Your Braising Liquid
Once the veggies have softened (which should just take a few minutes), it’s time to add your braising liquid. Just make sure you add the liquid before the veggies fully brown or burn!
Deglaze your veggies by adding some of your braising liquid to the pan.
You can use a wooden spoon to scrape the yummy browned bits off of the bottom of the pan and stir them into the liquid. This step is the foundation of your meal’s delicious flavors.
Bring Back Your Meat
Return your meat to the pan, and add more braising liquid if necessary. You want just enough liquid to submerge about half to three-quarters of your meat.
Bring the liquid to a boil, then immediately lower the heat to a simmer. Cover the pan, and let your meat sit on low heat.
Relax and Enjoy!
This is the time when you can safely step away. Your meat will braise for about one to three hours. Enjoy your downtime as the low heat turns your tough cuts of meat into tender goodness.
While it’s a good idea to check on the amount of liquid every so often (add more as necessary), the majority of this cooking time requires absolutely no effort on your end.
Once your meat is fork-tender, it is ready to eat. Remove from the heat, serve, and enjoy!
Bottom Line
Braising is a wonderful way for home cooks to bring the deep flavors and aromas of nostalgic comfort meals to their table. It’s a hands-off method that doesn’t require a ton of time, energy, or money.
With a deep HexClad pan, you can braise to your heart’s content. Our hybrid cookware is made with revolutionary technology that combines stainless steel with a nonstick surface. Our cookware is oven safe up to 500 degrees and induction-ready, giving you options for how and where to braise. Plus, with our dishwasher-safe pans, cleanup couldn’t be easier.
Whether you are making a pot roast or braising vegetables, HexClad has your back.
Sources
The Transformative Power of Braising Vegetables | Kitchn
